


Earlier in this chapter you learned how to use the ListBox control for displaying lists of strings and storing objects. The items of a ListBox control can be sorted, but they have no particular structure. I’m sure most of you wish that the ListBox control had more ‘‘features,’’ such as the means to store additional information along with each item or to present hierarchical lists. A hierarchical list is a tree that reflects the structure of the list: items that belong to other items appear under their parent with the proper indentation. For instance, a list of city and state names should be structured so that each city appears under the corresponding state.
The answer to the shortcomings of the ListBox control can be found in the TreeView and ListView controls. These two Windows controls are among the more-advanced ones, and they are certainly more difficult to program than the ones discussed in the preceding chapters. These two controls, however, are the basic makings of unique user interfaces, as you’ll see in this chapter’s examples. The TreeView and ListView controls implement two of the more-advanced data structures and were designed to hide much of the complexity of these structures — and they do this very well.
Understanding the ListView, TreeView, and ImageList Controls
I will start with a general discussion of the two controls to help you understand what they do and when to use them. A basic understanding of the data structures they implement is also required to use them efficiently in your applications. Then I’ll discuss their members and demonstrate how to use the controls. If you find the examples too difficult to understand, you can always postpone the use of these controls in your applications.
Some of the code I present in this chapter can be used as is in many situations, so you should look at the examples and see whether you can incorporate some of their code in your applications. The ListView and TreeView controls are excellent tools for designing elaborate Windows interfaces, and I feel they deserve to be covered in detail. It’s also common to use the ImageList control in conjunction with the ListView and TreeView controls. The purpose of the ImageList control is to store the images that we want to display, along with the items of the other two controls, so I’ll discuss briefly the ImageList control in this chapter.
Figure 4.20 shows the TreeView and ListView controls used in tandem. What you see in Figure 4.20 is Windows Explorer, a utility for examining and navigating your hard disk’s structure. The left pane, where the folders are displayed, is a TreeView control. The folder names are displayed in a manner that reflects their structure on the hard disk. You can expand and contract certain branches and view only the segment(s) of the tree structure you’re interested in.
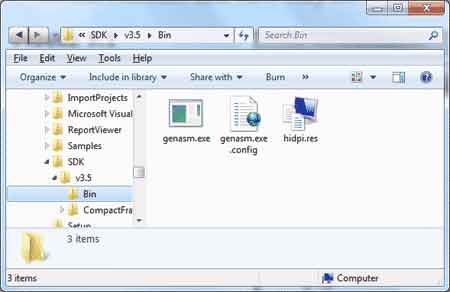
Figure 4.20 – Windows Explorer is made up of a Tree-View (left pane) and a ListView (right pane) control.
The right pane is a ListView control. The items on the ListView control can be displayed in five ways (as large or small icons, as a list, on a grid, or tiled). They are the various views you can set through the View menu of Windows Explorer. Although most people prefer to look at the contents of the folders as icons, the most common view is the Details view, which displays not only filenames, but also their attributes. In the Details view, the list can be sorted according to any of its columns, making it easy for the user to locate any item based on various criteria (file type, size, creation date, and so on). A Windows Explorer window with a detailed view of the files is shown later in this chapter, in Figure 4.23 in the section “Tree and List Structures of TreeView Control“.
