If you have done an installation of a complex software product before, you probably recognize that feeling of uncertainty that accompanies starting the installation for the first time. This feeling comes from the complexity of the product to be installed and the diversity of questions to be answered during the installation process. Because you may not completely understand the product, you (or the person who installs the software) may be less than confident that you can give accurate answers for all the questions that the Setup program asks to complete its tasks. This section will help you to find your way through the installation by giving you answers to most of the questions that you are likely to encounter.
As its name suggests, besides planning, Installation Center supports the installation of the software, too. Installation Center shows you several options related to the installation of the database system and its components. After clicking Installation, choose New SQL Server Stand-Alone Installation or Add Features To An Existing Installation, which launches a wizard to install SQL Server 2012.
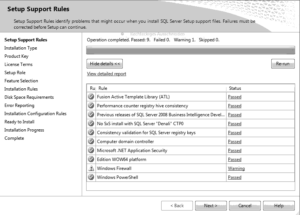
The first page of the wizard, Setup Support Rules (see Figure 2-3), identifies problems that might occur when you install SQL Server Setup support files. (Again, it is the same tool that is launched when you click System Configuration Checker during the planning phase.) Failures must be corrected before Setup can continue. If no problems are reported, click Next.
On the Installation Type page, choose one of the two radio buttons:
- Perform a new installation of SQL Server
- Add features to an existing instance of SQL Server
If you select the latter option, use the drop-down list to select the instance of SQL Server to update. After you have chosen an option, click Next.
On the next page of the wizard, Product Key, enter the 25-character key from the product packaging. (The alternative is to specify a free edition of the software, SQL Server Express, for instance.) Click Next to continue. On the License Terms page, click I Accept the License Terms.
The next page, Setup Role, allows you to choose between installing only the main components of SQL Server 2012 (Database Engine Services, Analysis Services, and Reporting Services) and installing additional auxiliary components, such as Power Pivot for SharePoint. Choose SQL Server Feature Installation and click Next.
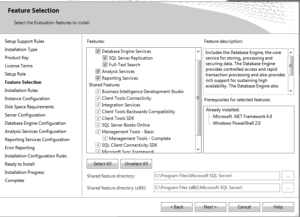
On the Feature Selection page (see Figure 2-4), select the components to install by checking the corresponding check boxes. Also, toward the bottom of the page, you can specify the directory in which to store the shared components. After that, click Next to continue.
On the next page, Installation Rules, the setup runs rules to determine if the installation process will be blocked. If all checks are passed (or marked “Not applicable”), click Next to continue.
On the Instance Configuration page (see Figure 2-5), you can choose between the installation of a default or named instance. To install the default instance, click Default Instance. If a default instance is already installed and you select Default Instance, the Setup program upgrades it and gives you the option to install additional components. Therefore, you have another opportunity to install components that you skipped in the previous installation processes.
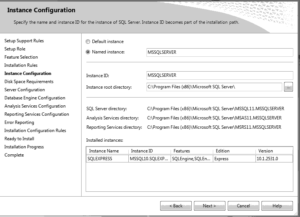
To install a new named instance, click Named Instance and type a new name in the given text box. In the lower part of the page, you can see the list of instances already installed on your system. As you can see from Figure 2-5, the computer on which I installed the instance already contains an installed instance. (MSSQLSERVER is the name of the default instance for the Database Engine.) Click Next to continue.
The Disk Space Requirements page shows whether the space available on your disk is sufficient for the installation of the database system. If so, click Next to continue.
The next page, Server Configuration (see Figure 2-6), allows you to specify usernames and corresponding passwords for services of all components that will be installed during the installation process. (You can apply one account for all services, but this is not recommended, for security reasons.)
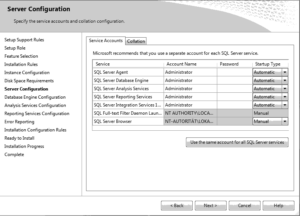
To choose the collation of your instance, click the Collation tab of the same page. (Collation defines the sorting behavior for your instance.) You can either choose the default collations for the components that will be installed, or click Customize to select some other collations that are supported by the system. Click Next to continue.
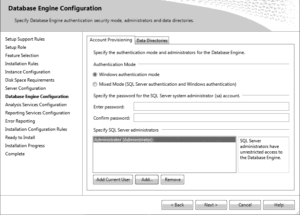
On the Database Engine Configuration page (see Figure 2-7), you choose the authentication mode for your Database Engine system. As you already know, the Database Engine supports Windows authentication mode and Mixed mode. If you select the Windows Authentication Mode radio button, the Setup process creates the sa (system administrator) login, which is disabled by default. If you choose the Mixed Mode radio button, you must enter and confirm the system administrator login. Click Add Current User if you want to add one or more users that will have unrestricted access to the instance of the Database Engine.
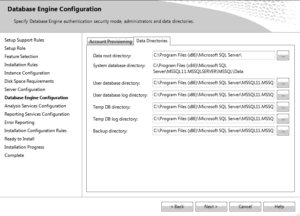
The other tab of the Database Engine Configuration page, Data Directories (see Figure 2-8), allows you to specify the locations for all the directories in which Database Engine–related files are stored. After that, click Next to continue.
What appears for the next step depends on whether or not you chose to install Analysis Services. (A Configuration page appears for each SQL Server component that you chose to install.) If you did choose to install it, a page similar to Figure 2-7 will appear for Analysis Services. Specify users that will have access to Analysis Services and click Next to continue.
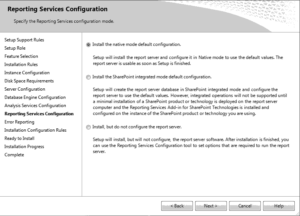
Similarly, what appears for the next step depends on whether or not you decided to install Reporting Services. If you indicated that Reporting Services should be installed, the Reporting Services Configuration page (see Figure 2-9) appears. On this page, you can decide just to install the report server (without its configuration) or to install and configure it. The third alternative is to integrate the report server with Microsoft Office SharePoint Server (a server program that can be used to facilitate collaboration, provide content management features, and implement business processes). After that, click Next to continue.
On the Error Reporting page, specify the information, if any, that you would like to send to Microsoft automatically. Clear the check box if you do not want to take part in this automatic reporting. Click Next.
The next page, Installation Configuration Rules, is similar to the earlier page called Installation Rules. At the end of this step, the summary of all configuration rules will be displayed.
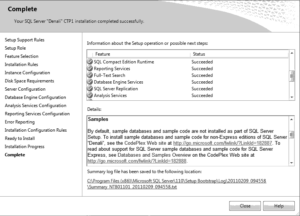
The last page, before the installation process actually starts, is the Ready to Install page. This page allows you to review the summary of all SQL Server components that will be installed. To start the installation process, click Install. Setup shows you the progress of your installation process. If the installation process succeeds, click Next. At the end, the Complete page (see Figure 2-10) appears, with the location of the file in which the summary log is stored. Click Close to complete the installation process. After that, you can use all components that you installed during the installation process.
