The Maintenance Plan Wizard provides you with the set of basic tasks needed to maintain a database. It ensures that your database performs well, is regularly backed up, and is free of inconsistencies.
Note – To create or manage maintenance plans, you have to be a member of the sysadmin fixed server role.
To start the Maintenance Plan Wizard, expand the server in SQL Server Management Studio, expand Management, right-click Maintenance Plans, and choose Maintenance Plan Wizard. As you can see on the starting page of the Maintenance Plan Wizard, you can perform the following administration tasks:
- Check database integrity
- Perform index maintenance
- Update database statistics
- Perform database backups
Note – I will show you how to use the Maintenance Plan Wizard to perform database backups. All other tasks can be performed in a similar manner.
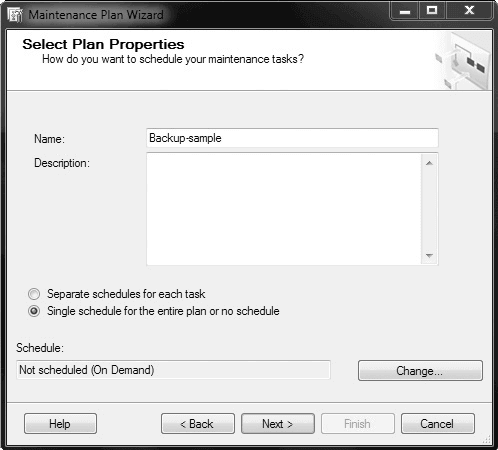
Click Next on the starting page, and the next wizard page, Select Plan Properties (see Figure 16-6), enables you to select properties for your plan, enter the plan’s name, and, optionally, describe the plan. Also, you can choose between separate schedules for each task or a single schedule for the entire plan. This example will perform the backup of the sample database, so name the plan Backup-sample and choose the Single Schedule for the Entire Plan radio button. The Schedule field allows you to create a schedule for the execution of the plan or to execute it on demand. (Chapter “Automating System Administration Tasks” describes in detail how you can create such a schedule. For purposes of this example, leave the Schedule field set to Not Scheduled (On Demand).)

Click Next, and the wizard enables you to choose between full, differential, and transaction log backups. (For the description of these options, see “Introduction to Backup Methods” at the beginning of this chapter.) Check Back Up Database (Full) and click Next, which opens the Select Maintenance Task Order page.You can then specify the order in which the tasks should be performed. (In this case, there is no order, because there is only one task to be performed.) Click Next, and the Back Up Database Full page appears.
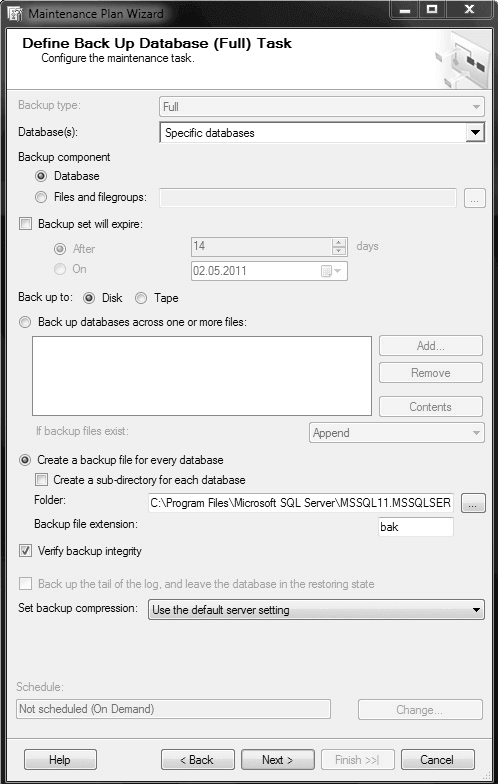
The next page, Define Back Up Database (Full) Task, enables you to specify several different options, as shown in Figure 16-7. First, select the database(s) on which the task should be performed. Then, select a destination for the backup files. The destination includes the media type and their location. (You can also specify an expiration date for your backup set.)

The next option, Create a Backup File for Every Database, allows you to create a separate file for each database you have specified in the Database(s) drop-down list box. Click this radio button, because this is the preferred way to maintain the backup of several databases. Check the last option, Verify Backup Integrity, so that the Database Engine checks the integrity of the backup files. Click Next to continue.
The Select Report Options wizard page allows you to write a report to a specific file and/or send an e-mail message. An e-mail message can be sent only to an existing operator. (Chapter “Automating System Administration Tasks” describes in detail how you can create an operator.)
To complete the wizard, click Finish. The wizard performs the task and creates a corresponding report.
To view the history of an existing maintenance plan, expand Management, expand Maintenance Plans, right-click the name of the plan, and choose View History. The Log File Viewer with the history of the selected plan is shown.
