

It’s time to demonstrate the members discussed so far with an example. The project you’ll build in this section is the TreeView Example project. The project’s main form is shown in Figure 4.27.
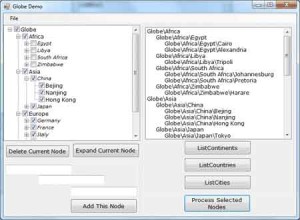
Fifure 4.27 – TreeView Example Exercise
The Add Categories button adds the three top-level nodes to the TreeView control via the statements shown in Listing 4.35. These are the control’s root nodes. The other two Add buttons add nodes under the root nodes.
Listing 4.35: The Add Categories Button
Protected Sub AddCategories Click(...) _
		Handles AddCategories.Click
	TreeView1.Nodes.Add("Shapes")
	TreeView1.Nodes.Add("Solids")
	TreeView1.Nodes.Add("Colors")
End SubCode language: VB.NET (vbnet)
When these statements are executed, three root nodes are added to the list. After clicking the Add Categories button, your TreeView control looks like the one shown here.

To add a few nodes under the node Colors, you must retrieve the Colors Nodes collection and add child nodes to this collection, as shown in Listing 4.36.
Listing 4.36: The Add Colors Button
Protected Sub AddColors Click(...) _
		Handles AddColors.Click
	Dim cnode As TreeNode
	cnode = TreeView1.Nodes(2)
	cnode.Nodes.Add("Pink")
	cnode.Nodes.Add("Maroon")
	cnode.Nodes.Add("Teal")
End SubCode language: VB.NET (vbnet)
When these statements are executed, three more nodes are added under the Colors node, but the Colors node won’t be expanded. Therefore, its child nodes won’t be visible. To see its child nodes, you must double-click the Colors node to expand it (or click the plus sign in front of it, if there is one). The same TreeView control with its Colors node expanded is shown to the left. Alternatively, you can add a statement that calls the Expand method of the cnode object, after adding the color nodes to the control:
cnode.Expand()Code language: VB.NET (vbnet)Run the project, click the first button (Add Categories), and then click the second button (Add Colors). If you click the Add Colors button first, you’ll get a NullReferenceException, indicating that the node can’t be inserted unless its parent node already exists. I added a few statements in the TreeView Example project’s code to disable the buttons that generate similar runtime errors. To add child nodes under the Shapes node, use the statements shown in Listing 4.37. This is the Add Shapes button’s Click event handler.
Listing 4.37: The Add Shapes Button
Protected Sub AddShapes Click(...) _
		Handles AddShapes.Click
	Dim snode As TreeNode
	snode = treeview1.Nodes(0)
	snode.Nodes.Add("Square")
	snode.Nodes.Add("Triangle")
	snode.Nodes.Add("Circle")
End SubCode language: VB.NET (vbnet)
If you run the project and click the three buttons in the order in which they appear on the form, the TreeView control will be populated with colors and shapes. If you double-click the items Colors and Shapes, the TreeView control’s nodes will be expanded.
Notice that the code knows the order of the root node to which it’s adding child nodes. This approach doesn’t work with a sorted tree. If your TreeView control is sorted, you must create a hierarchy of nodes explicitly by using the following statements:
snode = TreeView1.Nodes.Add("Shapes")
snode.Add("Square")
snode.Add("Circle")
snode.Add("Triangle")Code language: VB.NET (vbnet)
These statements will work regardless of the control’s Sorted property setting. The three shapes will be added under the Shapes node, and their order will be determined automatically. Of course, you can always populate the control in any way you like and then turn on the Sorted property.
Inserting a Root Node
Let’s revise the code we’ve written so far to display all the nodes under a new header. In other words, we’ll add a new node called Items that will act as the root node for existing nodes. It’s not a common operation, but it’s an interesting example of how to manipulate the nodes of a TreeView control at runtime.
First, we must add the new root node. Before we do so, however, we must copy all the first-level nodes into local variables. We’ll use these variables to add the current root nodes under the new (and single) root node. There are three root nodes currently in our control, so we need three local variables. The three variables are of the TreeNode type, and they’re set to the root nodes of the original tree. Then we must clear the entire tree, add the new root node (the Items node), and finally add all the copied nodes under the new root. The code behind the Move Tree button is shown in Listing 4.38.
Listing 4.38: Moving an Entire Tree
Protected Sub MoveTree Click(...) _
		Handles bttnMoveTree.Click
	Dim colorNode, shapeNode, solidNode As TreeNode
	colorNode = TreeView1.Nodes(0)
	shapeNode = TreeView1.Nodes(1)
	solidNode = TreeView1.Nodes(2)
	TreeView1.Nodes.Clear()
	TreeView1.Nodes.Add("Items")
	TreeView1.Nodes(0).Nodes.Add(colorNode)
	TreeView1.Nodes(0).Nodes.Add(shapeNode)
	TreeView1.Nodes(0).Nodes.Add(solidNode)
End SubCode language: VB.NET (vbnet)
You can revise this code so that it uses an array of Node objects instead of individual variables to store all the root nodes. For a routine that will work with any tree, you must assume that the number of nodes is unknown, so the ArrayList would be a better choice. The following loop stores all the root nodes of the TreeView1 control to the TVList ArrayList:
Dim TVList As New ArrayList
Dim node As TreeNode
For Each node in TreeView1.Nodes
	TVList.Add(node)
NextCode language: VB.NET (vbnet)
Likewise, the following loop extracts the root nodes from the TVList ArrayList:
Dim node As TreeNode
Dim itm As Object
TreeView1.Nodes.Clear
For Each itm In TVList
	node = CType(itm, TreeNode)
	TreeView1.Nodes.Add(node)
NextCode language: VB.NET (vbnet)
Enumerating the Nodes Collection
As you saw in the previous example, a Node object can include an entire tree under it. When we move a node, it takes with it the entire Nodes collection located under it. You can scan all the nodes in a Nodes collection by using a loop, which starts with the first node and then moves to the next node with the help of the FirstNode and NextNode properties. The following loop prints the names of all continents in the GlobeTree control:
Dim CurrentNode As TreeNode
CurrentNode = GlobeTree.Nodes(0).Nodes(0).FirstNode
While CurrentNode IsNot Nothing
	Debug.WriteLine(CurrentNode.text)
	CurrentNode = CurrentNode.NextNode
End WhileCode language: VB.NET (vbnet)
The last property demonstrated by the TreeView Example project is the Sorted property, which sorts the child nodes of the node to which it’s applied. When you set the Sorted property of a node to True, every child node you attach to it will be inserted automatically in alphabetical order. If you reset the Sorted property to False, any child nodes you attach will be appended to the end of the existing sorted nodes.

