


Toolbox Window
The Toolbox window contains all the controls you can use to build your application’s interface. This window is usually retracted, and you must move the pointer over it to view the Toolbox. The controls in the Toolbox are organized in various tabs, so take a look at them to become familiar with the controls and their functions. A figure of ToolBox window is illustrated in “Using the Windows Form Designer in Visual Basic 2008“.
In the first few chapters, we’ll work with the controls in the Common Controls and Menus & Toolbars tabs. The Common Controls tab contains the icons of the most common Windows controls. The Data tab contains the icons of the objects you will use to build data-driven applications (they’re explored later in this tutorial). The Dialogs tab contains controls for implementing the common dialog controls, which are so common in Windows interfaces; they’re discussed in Chapter, ‘‘Windows Controls.’’
Solution Explorer Window
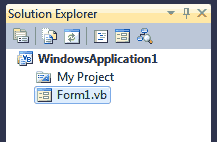
The Solution Explorer window contains a list of the items in the current solution. A solution can contain multiple projects, and each project can contain multiple items. The Solution Explorer displays a hierarchical list of all the components, organized by project. You can right-click any component of the project and choose Properties in the context menu to see the selected component’s properties in the Properties window. If you select a project, you will see the Project Properties dialog box. You will find more information on project properties in the following chapter.
If the solution contains multiple projects, you can right-click the project you want to become the startup form and select Set As StartUp Project. You can also add items to a project with the Add Item command of the context menu, or remove a component from the project with the Exclude From Project command. This command removes the selected component from the project, but doesn’t affect the component’s file on the disk. The Delete command removes the selected component from the project and also deletes the component’s file from the disk.
Properties Window
This window (also known as the Properties Browser) displays all the properties of the selected component and its settings. Every time you place a control on a form, you switch to this window to adjust the appearance of the control. You have already seen how to manipulate the properties of a control through the Properties window.
Many properties are set to a single value, such as a number or a string. If the possible settings of a property are relatively few, they’re displayed as meaningful constants in a drop-down list. Other properties are set through a more elaborate interface. Color properties, for example, are set from within a Color dialog box that’s displayed right in the Properties window. Font properties are set through the usual Font dialog box. Collections are set in a Collection Editor dialog box, in which you can enter one string for each item of the collection, as you did for the items of the ComboBox control earlier in this chapter.
If the Properties window is hidden, or if you have closed it, you can either choose View > Properties Window, or right-click a control on the form and choose Properties. Or you can simply press F4 to bring up this window. There will be times when a control might totally overlap another control, and you won’t be able to select the hidden control and view its properties. In this case, you can select the desired control in the ComboBox at the top of the Properties window. This box contains the names of all the controls on the form, and you can select a control on the form by selecting its name on this box.
