When you select the custom control in the Objects drop-down list of the editor and expand the list of events for this control, you’ll see all the events fired by UserControl. Let’s add a custom event for our control. To demonstrate how to raise events from within a custom control, we’ll return for a moment to the ColorEdit control you developed a little earlier in this chapter.
Let’s say you want to raise an event (the ColorClick event) when the user clicks the Label control displaying the selected color. To raise a custom event, you must declare it in your control and call the RaiseEvent method. Note that the same event may be raised from many different places in the control’s code.
To declare the ColorClick event, enter the following statement in the control’s code. This line can appear anywhere, but placing it after the private variables that store the property values is customary:
Public Event ColorClick(ByVal sender As Object, ByVal e As EventArgs)Code language: PHP (php)To raise the ColorClick event when the user clicks the Label control, insert the following statement in the Label control’s Click event handler:
Private Sub Label1 Click(...) Handles Label1.Click
	RaiseEvent ColorClick(Me, e)
End SubCode language: CSS (css)
Raising a custom event from within a control is as simple as raising an event from within a class. It’s actually simpler to raise a custom event than to raise the usual PropertyChanged events, which are fired from within the OnPropertyChanged method of the base control.
The RaiseEvent statement in the Label’s Click event handler maps the Click event of the Label control to the ColorClick event of the custom control. If you switch to the test form and examine the list of events of the ColorEdit control on the form, you’ll see that the new event was added. The ColorClick event doesn’t convey much information.When raising custom events, it’s likely that you’ll want to pass additional information to the developer.
Let’s say you want to pass the Label control’s color to the application through the second argument of the ColorClick event. The EventArgs type doesn’t provide a Color property, so we must build a new type that inherits all the members of the EventArgs type and adds a property: the Color property. You can probably guess that we’ll create a custom class that inherits from the EventArgs class and adds the Color member. Enter the statements of Listing 8.10 at the end of the file (after the existing End Class statement).
Listing 8.10: Declaring a Custom Event Type
Public Class ColorEvent
	Inherits EventArgs
	Public color As Color
End ClassCode language: PHP (php)
Then, declare the following event in the control’s code:
Public Event ColorClick(ByVal sender As Object, ByVal e As ColorEvent)Code language: PHP (php)And finally, raise the ColorClick event from within the Label’s Click event handler (see Listing 8.11).
Listing 8.11: Raising a Custom Event
Private Sub Label1 Click(...) Handles Label1.Click
	Dim ev As ColorEvent
	ev.color = Label1.BackColor
	RaiseEvent ColorClick(Me, ev)
End SubCode language: PHP (php)
Not all events fired by a custom control are based on property value changes. You can fire events based on external conditions or a timer.
Using the Custom Control in Other Projects
By adding a test project to the Label3D custom control project, we designed and tested the control in the same environment. A great help, indeed, but the custom control can’t be used in other projects. If you start another instance of Visual Studio and attempt to add your custom control to the Toolbox, you won’t see the Label3D entry there.
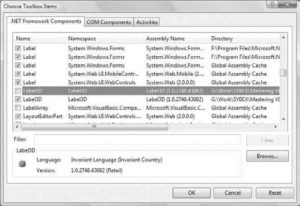
To add your custom component in another project, open the Choose Toolbox Items dialog box and then click the .NET Framework Components tab. Be sure to carry out the steps described here while the .NET Framework Components tab is visible. If the COM Components tab is visible instead, you can perform the same steps, but you’ll end up with an error message (because the custom component is not a COM component).

Click the Browse button in the dialog box and locate the FlexLabel.dll file. It’s in the Bin folder under the FlexLabel project’s folder. The Label3D control will be added to the list of .NET Framework components, as shown in Figure 8.6. Select the check box in front of the control’s name; then click the OK button to close the dialog box and add Label3D to the Toolbox. Now you can use this control in your new project.


