The simplest type of custom Windows control you can build is one that enhances the functionality of an existing control. Fortunately, they’re the most common types of custom controls, and many developers have their own collections of “enhanced” Windows controls. The Windows controls are quite functional, but you won’t be hard-pressed to come up with ideas to make them better.
The TextBox control, for example, is a text editor on its own, and you have seen how easy it is to build a text editor by using the properties and methods exposed by this control. Many programmers add code to their projects to customize the appearance and the functionality of the TextBox control. Let’s say you’re building data-entry forms composed of many TextBox controls.
To help the user identify the current control on the form, it would be nice to change its color while it has the focus. If the current control has a different color from all others, users will quickly locate the control that has the focus.
Another feature you can add to the TextBox control is to format its contents as soon as it loses focus. Let’s consider a TextBox control that must accept dollar amounts. After the user enters a numeric value, the control could automatically format the numeric value as a dollar amount and perhaps change the text’s color to red for negative amounts. When the control receives the focus again, you can display the amount without any special formatting, so that users can edit it quickly. As you will see, it’s not only possible but actually quite easy to build a control that incorporates all the functionality of a TextBox and some additional features that you provide through the appropriate code. You already know how to add features such as the ones described here to a TextBox from within the application’s code. But what if you want to enhance multiple TextBox controls on the same form or reuse your code in multiple applications?
The best approach is to create a new Windows control with all the desired functionality and then reuse it in multiple projects. To use the proper terminology, you can create a new custom Windows control that inherits the functionality of the TextBox control. The derived control includes all the functionality of the control being inherited, plus any new features you care to add to it. This is exactly what we’re going to do in this section.
Building the custom control FocusedTextBox Control
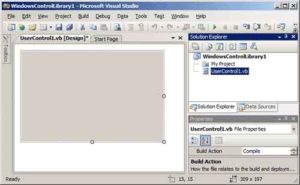
Let’s call our new custom control FocusedTextBox. Start a new VB project and, in the New Project dialog box, select the template Windows Control Library. Name the project FocusedTextBox. The Solution Explorer for this project contains a single item, the UserControl1 item. UserControl1 (see Figure 8.1) is the control’s surface — in a way, it’s the control’s form. This is where you’ll design the visible interface of the new control using the same techniques as for designing a Windows form. (Download the source code)

Figure 8.1 – A custom control in design mode
Start by renaming the UserControl1 object to FocusedTextBox. Then save the project by choosing File ➤ Save All. To inherit all the functionality of the TextBox control into our new control, we must insert the appropriate Inherits statement in the control’s code. Click the Show All button in the Solution Explorer to see all the files that make up the project. Under the FocusedTextBox.vb file is the FocusedTextBox.Designer.vb file. Open this file by double-clicking its name and you’ll see that it begins with the following two statements:
Partial Public Class FocusedTextBox
Inherits System.Windows.Forms.UserControlCode language: CSS (css)
The first statement says that the entire file belongs to the FocusedTextBox class; it’s the part of the class that contains initialization code and other statements that the user does not need to see because it’s left unchanged in most cases. To design an inherited control, we must change the second statement to the following:
Inherits System.Windows.Forms.TextBoxCode language: CSS (css)This statement tells the compiler that we want our new control to inherit all the functionality of the TextBox control. You must also modify the InitializeComponent method in the FocusedTextBox.Designer.vb file by removing the statement that sets the control’s AutoSizeMode property. This statement applies to the generic UserControl object, but not to the TextBox control. As soon as you specify that your custom control inherits the TextBox control, the UserControl object will disappear from the Designer. The Designer knows exactly what the new control must look like (it will look and behave exactly like a TextBox control), and you’re not allowed to change it its appearance.
If you switch to the FocusedTextBox.vb file, you’ll see that it’s a public class called FocusedTextBox. The Partial class by the same name is part of this class; it contains the code that was generated automatically by Visual Studio.When compiled, both classes will produce a single DLL file. Sometimes we need to split a class’s code into two files, and one of them should contain the Partial modifier. This keyword signifies that the file contains part of the class. The FocusedTextBox.vb file is where you will insert your custom code. The Partial class contains the code emitted by Visual Studio, and you’re not supposed to touch it. Inherited controls are an exception to this rule, because we have to be able to modify the Inherits statement.
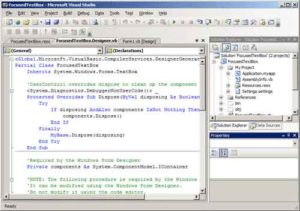
Let’s test our control and verify that it exposes the same functionality as the TextBox control. Figure 12.2 shows the IDE while developing an inherited control. Notice that the FocusedTextBox control has inherited all the properties of the TextBox control, such as the MaxLength and PasswordChar properties.

Figure 8.2 – The IDE during the design of an inherited control
To test the control, you must add it to a form. A control can’t be executed outside the context of a host application. Add a new project to the solution (a Windows Application project) with the File ➤ Add ➤ New Project command. When the Add New Project dialog box appears, select the Windows Application template and set the project’s name to TestProject. A new folder will be created under the FocusedTextBox folder — the TestProject folder — and the new project will be stored there. The TestProject must also become the solution’s startup object. (This is the very reason we added the project to our solution: to have an executable for testing the custom control.) Right-click the test project’s name in the Solution Explorer and select Set As StartUp Object in the context menu.
To test the control you just “designed,” you need to place an instance of the custom control on the form of the test project. First, you must build the control. Select the FocusedTextBox item in the Solution Explorer, and from the Build menu, select the Build FocusedTextBox command (or right-click the FocusedTextBox component in the Solution Explorer and select Build from the context menu). The build process will create a DLL file with the control’s executable code in the Bin folder under the project’s folder.
Then switch to the test project’s main form and open the ToolBox. You will see a new tab, the FocusedTextBox Components tab, which contains all the custom components of the current project. The new control has already been integrated into the design environment, and you can use it like any of the built-in Windows controls. Every time you edit the code of the custom control, you must rebuild the control’s project for the changes to take effect and update the instances of the custom control on the test form. The icon that appears before the custom control’s name is the default icon for all custom Windows controls. You can associate a different icon with your custom control, as explained in the ‘‘Classifying the Control’s Properties” section, later in this chapter.
Place an instance of the FocusedTextBox control on the form and check it out. It looks, feels, and behaves just like a regular TextBox. In fact, it is a TextBox control by a different name. It exposes all the members of the regular TextBox control: You can move it around, resize it, change its Multiline and WordWrap properties, set its Text property, and so on. It also exposes all the methods and events of the TextBox control.


