Throughout these lessons you will be working with the Anaconda Python distribution which is one of the most popular Python distributions out there. We chose this particular distribution because of all the different software that comes with it by default. In particular it has the IPython interpreter which we will use to execute code both interactively one code snippet at a time or one line of code at a time as well as to execute full Python applications which we refer to as scripts.
It also has a local Jupiter notebooks server that will enable you to run this thing called Jupiter notebooks in your web browser locally on your computer. And as you’ll see in the examples in coming lessons, Jupiter notebooks are really convenient way to not only type and execute Python code, but you can also embed in them text and images and videos and other web-based content to create a combination of both code and other materials and that’s particularly important for reproducibility. If you’re doing data science studies or other types of studies and you want other people to be able to reproduce your results, Jupiter notebooks are really popular way of doing that.
You can get the latest installer for Anaconda from the official website https://www.anaconda.com. Once you the download installer simply go to your downloads folder and double-click it to execute it.
Updating Anaconda
Once the anaconda distribution installation is complete you’re going to want to execute a couple of commands to make sure that everything is fully up-to-date. To do that, you’re going to begin by opening a command line window on your system. In the case of Mac OS users you can do that with a Terminal window from the Applications folder in your Utilities subfolder of that Applications folder.
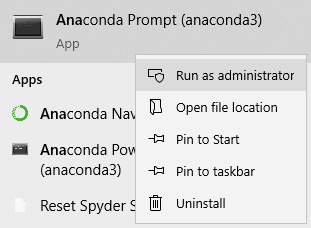
If you’re on Windows you’re going to want to open the Anaconda Prompt. It’s important to execute that as Administrator to ensure that the software is allowed to update your system.
For Linux users this will depend on your particular Linux distribution. Some of them will have a terminal app just like on Mac OS. Others will simply have cell windows where you can execute the commands that we are gong to discuss.
For those of you who are on Microsoft Windows, once you’ve gone and installed anaconda, you’re going to have in your start button an Anaconda Prompt that’s available to you. You can look for it yourself through the start menu or you can simply search for anaconda prompt in the search bar.
When it pops up in the search list, right click that and select Run as administrator. That’s the way you’re going to want to ensure that you execute the anaconda command prompt any time that you intend to modify your system which happens when you are updating the code.

Once you proceed then you’ll see the Anaconda prompt show up on your screen.

Once you’ve got your command line window open on your system, you’re going to execute two different commands:
conda update conda
conda update --all
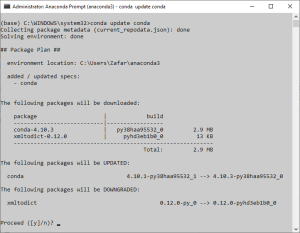
conda update conda is going to in install any updates to the tool called conda that you’ll be using frequently to install additional libraries. conda update – – all is going to look at all of the libraries and other software that were installed when you installed the Anaconda Python distribution and it will check for updates to all of them. It will also look at the dependencies between all those different software libraries and tell you that which individual pieces need to be updated.

In the above figure you can see that I’ve already executed the conda update conda command. This will take a few moments to a few minutes to update depending on how much stuff you’ve installed along the way. And sometimes it will have no updates and sometimes it will show items that need to be downloaded and installed or updated or even downgraded if there was for example a bug in a specific version and therefore that version might’ve been pulled from the software distribution websites.
Depending on your installation you will see it’s saying that several packages will be downloaded, several packages will be up to updated, some will be superseded by a new library and a couple of packages would be downgraded. To proceed with the update type ‘Y’ and press Enter.
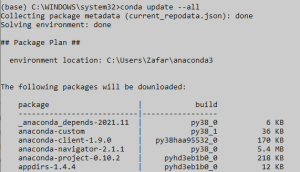
Similarly once that command completes you’re going to want to execute conda update --all. And again as it looks it all the different software that’s installed to figure out the dependencies among those items, that will take a couple minutes and then you’ll see something like what I’ve got.

Here you will see what packages will be downloaded, what packages will be installed, what packages will be removed and what packages will be updated. Type ‘Y’ and press enter to complete update. You’ll want to do this the first time that you install the software if you want to keep the software up to date. You might want to do these two commands every once in a while if you’re working in a scenario where you need to have reproducibility.

You must be logged in to post a comment.